Replacing Broken Dial Glasses
Replacing Broken Dial Glasses
REPLACING DAMAGED DIAL GLASSES.
A broken dial glass completely disfigures a radio that may otherwise have a chassis in good working order in a perfect case. Getting a replacement original dial glass is often impossible and the radio cannot take its place on display in the collection.
I have set out in this article some ways in which a replica dial glass can be created that is hard to tell from the original, using a computer, a common multifunction printer that has a scanner, some common photo programmes and A4 transparency sheet, and some pieces of clear acrylic sheet 0.75 to 1.0 mm thick.
Method 1. Creating a replica dial glass using the broken dial glass
Assemble the pieces of the broken dial glass on the scanner glass pressed together a close as possible so that the cracks are not wide apart.
Scan the broken dial glass into a photo editing programme such as Paint Shop Pro or one of many similar ones to create a JPG image. Save this image into a suitable folder on the hard drive.
Work on the image with some of the tools in the Photo Editor to remove the break lines- a brush or a clone tool will do the job. You will now have a good looking image of the dial glass on the screen. Save it and print it out on plain paper. If you are satisfied with the look of it , proceed to the next steps. You now have an image to turn into a dial glass replica in the following steps. There are two options available.
You can produce a transparency with adhesive backing to stick on to a pieces of glass or acrylic the right size of the dial glass. Using the Photo Editor produce a mirror image of the dial glass. This can be applied to the clear glass or acrylic after the paper backing on the transparency sheet is removed. The ink on the transparency must be completely dry so that the transparency can be gently rubbed or rollered to remove air bubbles in the adhesive. This method produces a passable result but I have found that it is very difficult to remove completely very tiny air bubbles that can be seen from diagonal viewing of your replica.
You can also print a direct image on clear non-stick transparency sheet. This image is the sandwiched between two think sheets of glass or clear acrylic that are edge clamped together with small thin brass or aluminium u- pieces. This is my preferred method.
It may take a little practice with the Photo Editor to get the perfect image and a few test prints on plain paper, but these materials are cheap an expendable.
Method 2. Creating a dial glass from scratch.
This is what you do when you have no broken dial glass pieces to copy from.
You will need a Desk Top Publishing programme. My choice is Pagemaker, and there are many others
First create a rectangle on the screen of the size of the dial glass. Print this out on a sheet of plain paper and use it to sketch in the design for the scales and lettering and numbering. Creative graphics are required.
Next get to work on the image on the screen with the design desired. The Deak Top Publisher will let you have line , numbers and letters of any size and colour.
When you have got your desired image, save it to your folder on the hard drive . You can print it on adhesive transparency or plain transparency using the final steps as in Method !.
Instead of creating an original design you will be able to use pieces from other dial glass images that you have scanned into your hard drive folder. It is possible to cut and paste sections of image from your library and import them into a new design. Even scans of photos can be used. I like the Desk Top publisher because it allows all the sizes to be adjusted to fit into a pleasing final image for printing.
Over the years I have collected and scanned a number of dial glasses for my library. There are quite a few radios with good dial glasses that are otherwise beyond salvation and ready for the parts only heap
To thank the Author because you find the post helpful or well done.
Repairing broken scale glass

Hello,
Here I would like to add some of my experience about dial glass restoration. If it is broken, major problem is the difference in the light-breaking index between the glass and air or glue. Pieces which are put together stay visible.


The solution is the glue with exactly the same index as glass. I use Kanadabalsam, which is used to glue cover glass on microscope slides.

The only problem is that it needs a few days to harden. I repaired above shown dial glass, corrected the paint at the back side,

and the result is shown at the next photos.


Joint lines are not visible at all. Of course, it is not cheap and it's good if you have a friend working in some biology-lab who could help you. A few drops are enough! Excess can be cleaned with xylol, but only on the front, unprinted side. I do not know if there is some other, cheaper, glue with the same light-breaking index? Please, let me know if you do.
To thank the Author because you find the post helpful or well done.
Repairing broken scale glass
I have not yet tried this adhesive but it claims to make invisable repairs to glass and is reasonably priced at under $3 in Home Depot stores in the USA.
.jpg)
To thank the Author because you find the post helpful or well done.
Dial glass repair problems

I have been using UHU Glass Glue a couple of times - the German equivalent to LOCTITE Glass Glue that was mentioned by Jay. 
The result very much depended on the particular problem. In some cases it worked nicely and the crack line was hardly visible after the repair. In some other cases it was not at all convincing. What was the reason?
In some cases I found it extremely difficult to properly align the two parts of the dial glass, even when pressing them against a very straight steel ruler.
If the table top on which you are doing the operation is not VERY even, the two parts will slightly tilt. This has the consequence that there will be a minute gap between the two parts - either on the front or on the rear side. Maybe using Kanada balsam, this will not pose a problem - but it does when you use LOCTITE. The technical data sheet states explicitely that LOCTITE is not a filler! This means that in case your two fragments are not really perfectly aligned, the joint will (i) be visible and even worse (ii) the bonding will not be very strong, Remember that the bending moment of a long dial glass is very singnificant! I had a case where the joint seemed to be perfectly glued, but when I put the dial glass back into the chassis and fastened the clamps, it fell into pieces again. The force exerted by the clamps was certainly not enormous, but still the bending moment was too strong. The bad news: you have only one try. It is practically impossible to remove all traces of the glue from the crack surface before you do a second attempt.
Glass is brittle. In some cases I experienced that the edge of the crack was 'fringy'. In the process of breaking, minute parts of the crack edge flew away. This again poses a serious problem - in particular if it happened on the front side of the dial glass. Unless you're using a glue showing the same refractive index as glass, the repair will always show and annoy you.
Though studying the technical data sheet of LOCTITE glass glue very attentively, I missed one point that is stated in the instructions of my UHU glass glue: The bonding will only be perfect if during the curing procedure, the joint is irradiated using ultraviolett light. I can confirm that! Being an inquisitive person I tried to do it without UV-light. The result: UHU glass glue did not properly harden but stayed stayed plastic-sticky.
There is yet another problem that I encoundered in the beginning of my dial glass repair career: If you have a very flat surface work top, and you managed to do everything right, how do you remove the repaired dial glass from the surface of your support? UHU and LOCTITE Glass Glues are not very liquid, but inevitably a few droplets of the glue will seep underneth the glass and attach it firmly to your support - a consequence of capillary suction. Trying to lever your dial glass off the support will end in catastrophy. After several mishaps I'm now putting KAPTON polyimide foil between the supporting surface and the dial glass. LOCTITE does not stick very well to KAPTON and you can simply peel it off afterwards.
What I wanted to say is: Dial glass repair sounds like an easy job, but it isn't :c((
To thank the Author because you find the post helpful or well done.
Dial glass repair problems
The other option is to get a replacement cut and then use some kind of laser printing to create a water slide, or print on plastic film behind the glass. Here it's €5 to have the glass cut and €5 for each hole.
My plan was to use black text on water-slide transfer paper and then a laminator to make the text white from white thermal transfer film. Unfortunately the clear carrier melts slightly and the background has white snow! So I laser printed black to quality clear film and simply mounted it at the edges of the glass hidden by bezel.
I since discovered that some models of laser printer used by T-Shirt and label printing companies do take white toner. My local one won't print on any material I supply :(
White, cream, gold, silver, copper and metalic colours of thermal transfer film exist. It works in a laminator because the toner of the laser print melts.
I've also printed in colour from the colour laser on fabric by using "oven proof"/"grease proof paper" in the laser printer, then ironing the back! You then soak off the paper! Very shiny magazine stock is supposed to also work. PCB masks are supposed to be possible using black. Colour rendition on fabric was poor as you see rear of print. I've not tried the idea on glass or plastic direct, which might give better colour rendition. It won't do pale shades, white, cream, gold silver etc. You need either a special Alps printer, white toner or use the thermal transfer films.
To thank the Author because you find the post helpful or well done.
Dial glass repair problems
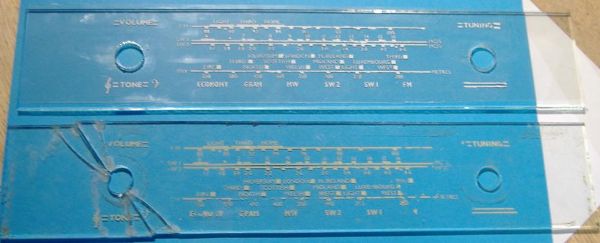
Here is a broken Perspex one.
Later I'll replace the scale. For now it's glued.
To thank the Author because you find the post helpful or well done.
Replacing Broken Dial Glasses

Hallo Keith,
I have applied the suggestions of your method 1 to rebuilt the dial glass of a Graetz musica 817 that has been get broken in severel pieces during the post shipping.
The work at the end is quite good and of course i have encountered the problems you mentioned but there is a problem that i still not have solved.
I have printed the dial image on 2 A4 transparent adhesive sheets joined together on the acrylic support, but the dial is transparent also in the inked zone, the ink covered is not sufficient, the light is not filtered totally and you can see on the back of the dial glass.
Have you encounterd this problem and you have found a solution about it?
I think that a possible solution, that I would like to test, could be masking the zones that must be darkened, producing a design of these zones that must be cutted out on a black paper his to overlap behind the dial glass.
Many thanks for your article and support
Regards
Roberto


To thank the Author because you find the post helpful or well done.