hismasters: 1121: Repair and Restoration - The Cabinet
hismasters: 1121: Repair and Restoration - The Cabinet
Though I mostly collect Battery Tube sets this 1950 set always fascinated me. Coincidently it arrived by courier (9.05am) the same day Wolfram Zylka (also a member here) visited me. He pointed out that it wasn't as unique as most British people think. Telefunken did it first!
The set of course cost me x3 as much for shipping as actually buying it! On the eBay photograph it didn't look worm-holed or broken, just very shabby with large areas of varnish flaking off the top.

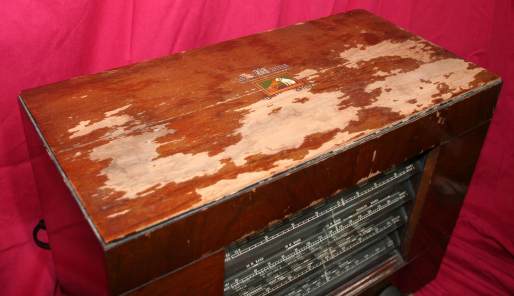
ebay photos matched reality
I advised the seller to completely fill the inside with balls of newspaper after moving tuning to the maximum wave end, vanes inside closed, and then pack twists of paper between the glass slats.
Then to put cardboard on front, excluding knobs, then more balls of paper and another card. Unfortunately I forgot to warn him not to tape direct to case, so some tape removed more loose varnish :-(.
I told him to fill round in the box with scrumpled balls of newspaper too. He followed my instructions exactly and the radio set arrived matching the photos exactly. Which was really very good as he was selling it "Collect in Person only" and I persuaded him to use Courier. Using a reseller it's mysteriously about 1/4 the price of the direct retail purchase, or a about 10% cheaper than a "cheap courier"!
Obvious Positives and faults
The tuning cord was snapped, the dial pointer assembly seemed to be jammed.
The glass and dial print in perfect condition (so I carefully cleaned and scanned them).
Bare wood exposed by flaked varnish, small bits of logo missing.But veneer fairly good and no woodworm.
Everything inside intact (except snapped cord) and appeared orignal. Back cover in astounding condition, except leather strap hinges snapped.
I took out chassis (see model pictures) and indeed underneath all seemed original.
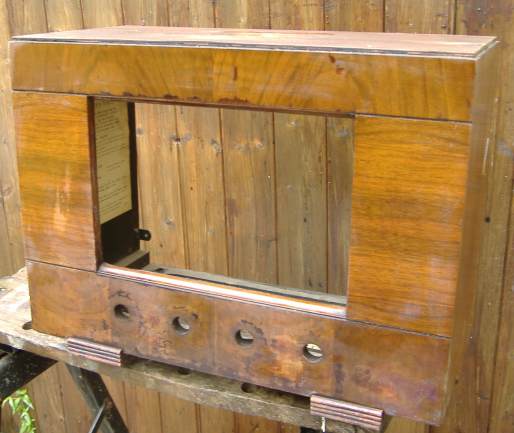
The Cabinet.
This is often more work and much trickier for me than the Electronics. So I do it first! I decided not to strip and redo toner or stain. I certainly would not normally consider French Polish or "Danish oil", I doubt any 1940s or later set ever finished with either. I decided on a minimalist approach of clean, gentle rub with "white Spirit" and then "methylated spirits". The speaker baffle was very greasy with soot. I think as if the set was in a house with a chimney fire once,

I gave scratched and bare areas alternately a touch up with a "furniture scratch" repair pen of suitable tint and rub with methylated spirits.

Freeing the scale pointer was just a matter of WD40, wipe off and then a light oil. Probably Graphite would be better.
Next I unpeeled the speaker cloth (a coppery effect very open mesh) and cleaned it.

Sadly it split when being reattached to the baffle board. So I coloured a piece of sheer (almost see through) skirt fabric.
I resprayed the baffle board matt black and cleaned the speaker cone.
I used several coats of Acyrilic varnish. Extra on the bare wood of the top.
The dial cord was replaced with Builders "Tile" cord, waxed with a candle. You can buy real woven fishing line (that might be linen), but it's 250m reels at €25 and the Tiling cord seems to work (€2 for 100m). I've also used €2 child's "crab line" on some sets. I think it's possible to figure out the arrangement, but the service sheet shows it clearly. See the composite model photograph.
One Dial Bulb was gone so I replaced all four with new 6.5V 300mA type purchased from a Gentleman in Scotland.

Jumping Ahead: Reassembled with cleaned glass, varnish dry and new speaker cloth.
I might replace the broken leather straps but for now I used impact adhesive to join the breaks.
Next
The spindle fell out of the volume /on-off control. I'll do a separate article about how I fixed it.
Then the Electronics!
To thank the Author because you find the post helpful or well done.