Tip: : Easily photograph Tubes (Valves)
Tip: : Easily photograph Tubes (Valves)
There are two main methods:
-
A camera with Macro or Closeup. Even as low as 3M pixels is OK with Macro mode. If the camera has no Macro/Close up mode it's likely that 1.2m (4') to 2m (6' 6”) or more is minimum distance and a tripod with 12M pixels is needed.
-
A flat bed scanner that has good depth of field. Newer cheaper ones are not usually good.
Ideally use some Matt white card or several sheets of paper curved behind the tube so there is no sharp edge between the flat and the rear. Shine a lamp (or even a CFL hand torch) on to the rear paper/card to make it evenly lit and brighter than the room..
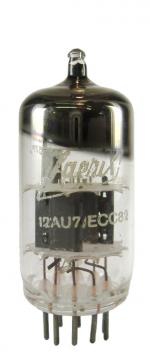
Here is an example with a couple of mistakes:
The middle photo is nearly ideal but the left and right are poor. The left has too much front light and the right one has too little light. The sharp shadow is avoided by the curved sheet of paper going under the tube pins and behind.
The tube should be about 8cm (3”) from the paper or card behind and the camera 20cm (8”) to 50cm (20”) from the tube (valve), depending on the camera.
Disable flash.
Either disable Auto focus or if that's not possible make sure the centre “focus” box is on the writing of the tube and press the button the “partial” amount or other method your camera uses to focus.
You don't need a tripod. You can use any suitable block or object that raises camera lens to middle of tube and simply hold the camera down on the object.
Georg Richter suggests setting the tube on a transparent film container or translucent plastic container, but if you add “back light” to curved card or paper that will work well 
Also with diffuse front light and dark background (but harder to get the lighting perfect)

Using Irfanview or Gimp (free) or Paint Shop Pro or Photoshop “crop” and scale to 800 to 933 pixels high and then save as jpeg at 50% quality.
If your photo editing has Histogram, dark level, white level and Gamma adjustment you can enhance the detail in the shadows and highlights while maximising contrast.
Here is result of curved card that has the light shining on the card and not the tube (valve) and some editing afterwards
The front lighting in the room is a little too direct but acceptable. Make sure you you position where you take the pictures that you don't get a strong reflection of a light. If it's a bright sunny day you may need to pull the curtains.
Scanning
Joe Sousa writes:
Martin got spectacular results with the back lighting. I will have to remember this next time I do a tube scan.
I have used scanning to get very fine detail in small tubes such as with these examples. My scanner is an Epson Perfection 1200.


This scanner is a few years old and is about 4 inches (10cm) tall. I also have a Canon Lide 25 that has a very short depth of field and is not usable for this work.
This difference in depth of field is not surprising because the internal illumination and scanning mechanism of the Canon are powered entirely by the USB port, so a wider F-stop is needed at the lens array in front of the CCD sensors to capture a small amount of light. The lighting of the older Epson is much stronger, so that a narrower F stop could be used that greatly increases depth of field.
To thank the Author because you find the post helpful or well done.
-
Excellent advice.
One thing that I might add:
You had mentioned setting the camera to manual focus mode, to prevent it from focusing on the wrong point. One other thing that I do is adjust the aperture to about f5.0 or more, to increase the depth of field so that more of the object will be in focus. My camera defaults to its largest aperture, which is f2.8. So, I have to manually override this setting. Not all cameras have the option of manually setting the aperture, but if the option is available, setting it to a smaller aperture (numerically larger) will help to keep more of the image in focus. Of course this means a longer exposure, but if you are using a tripod, then it doesn't matter.
To thank the Author because you find the post helpful or well done.