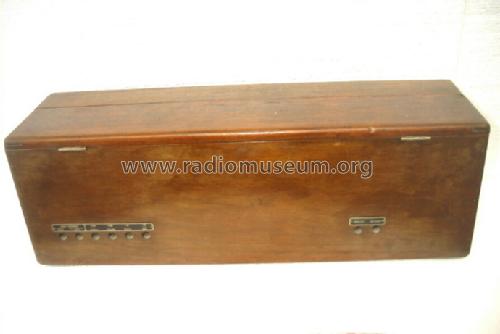
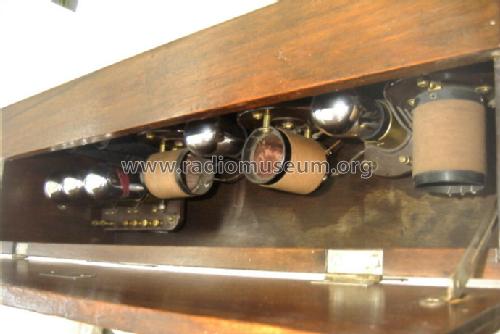
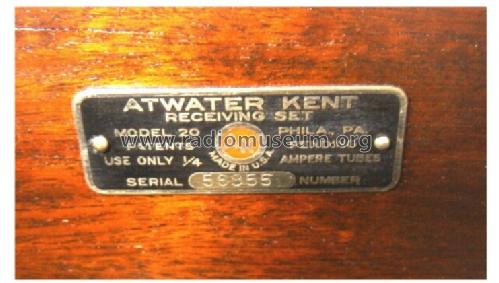
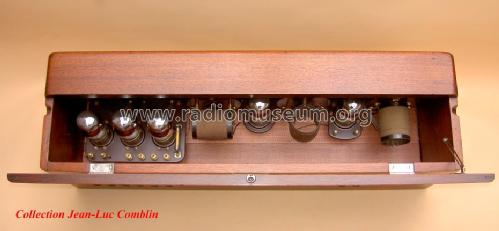
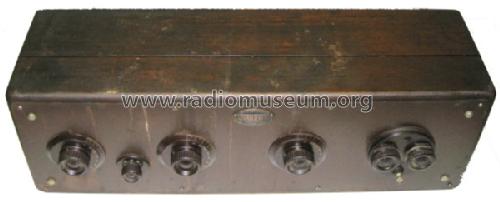
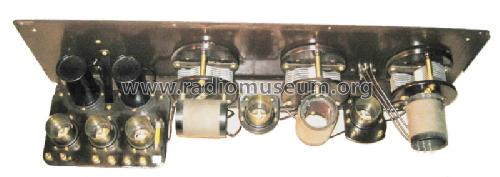
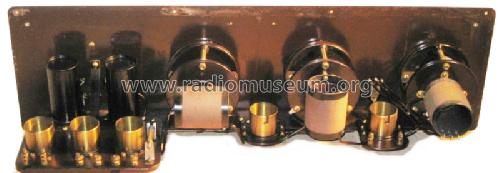
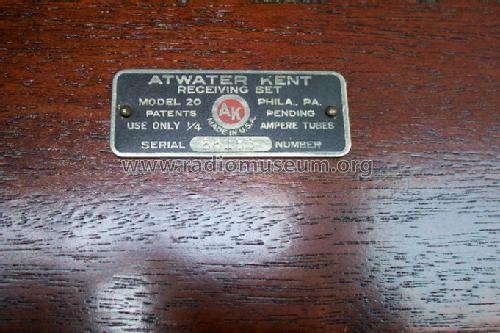
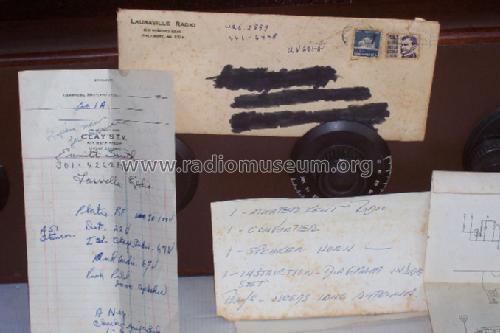
4640 Model 20 big box
Atwater Kent Mfg. Co.; Philadelphia, USA
- Country
- United States of America (USA)
- Manufacturer / Brand
- Atwater Kent Mfg. Co.; Philadelphia, USA
- Year
- 1924
- Category
- Broadcast Receiver - or past WW2 Tuner
- Radiomuseum.org ID
- 33215
Click on the schematic thumbnail to request the schematic as a free document.
- Number of Tubes
- 5
- Main principle
- TRF without regeneration
- Tuned circuits
- 3 AM circuit(s)
- Wave bands
- Broadcast only (MW).
- Power type and voltage
- Storage and/or dry batteries
- Loudspeaker
- - For headphones or amp.
- Material
- Wooden case
- from Radiomuseum.org
- Model: 4640 Model 20 big box - Atwater Kent Mfg. Co.;
- Shape
- Tablemodel, Box - most often with Lid (NOT slant panel).
- Dimensions (WHD)
- 26 x 8 x 8 inch / 660 x 203 x 203 mm
- Notes
-
There is also the smaller 20C Compact in two versions ! They use the same label "20" (without the "C")!
VA2OBW remarks:
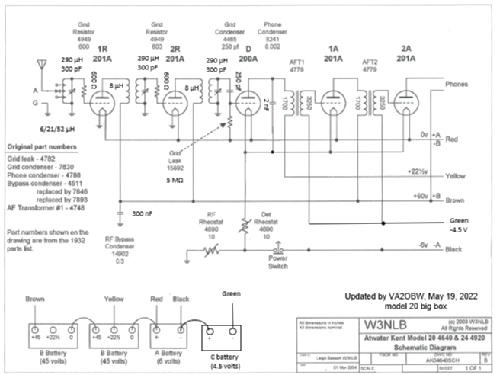
- Both 201A audio tubes (1A and 2A in the schematic) can be replaced by 112A ones, for a better audio performance with an external loud speaker and a much better linearity in AF. However, little difference in audio if the last tube only is 112A and the first AF tube is the 201A. A minor modification is required: the grid of the AF tubes has been disconnected from -A (black wire) and connected to -C battery (-4.5 V). The +C is connected to black wire (-A).
- Audio waveforms were measured with an oscilloscope having a FFT capability and a high voltage probe for an input RF signal of 1 MHz, modulated 100%. For 1 KHz modulation, the 2nd harmonic is more than 15 dB, and the 3rd one more than 40 dB lover than the 1 KHz tone. At more than 1 KHz the 2nd harmonic is 20 dB lower. The waveform is distorted at 300 Hz (second harmonic at the same level). Results improved toward 600 Hz, at 800 Hz almost good. Audio bandwidth 300-3400 Hz.
- L and C component values on updated schematic (VA2OBW) have been measured with an Agilent U1732C handheld LCR meter.
- RF measurements has been done with the Rohde & Schwarz SM300 signal generator, using output impedance transformer (from 50 Ω of the signal generator to long wire antenna impedance). Receiver sensitivity is around -73 dBm at 1 MHz with a very good signal to noise ratio; signals at -80 dBm still detectable. Noise level is -88 dBm. At the band edges, 550 KHz and 1400 KHz, respectively, the sensitivity is around – 60 dBm.
- When tuning, start with the right-side capacitor and the middle one at the same value according to the next table. Continue to the left one to maximize the audio output. This one can tune at few % difference depending on your antenna and antenna switch position. Adjust once again all capacitors for maximum signal.
-
Tuning dial (C%) versus frequency
no. Frequency (KHz) C (%) 1 525 100 2 550 88 3 600 73 4 700 53 5 800 40 6 900 31 7 1000 25 8 1100 20 9 1200 15 10 1300 12 11 1400 7 12 1500 0
- Price in first year of sale
- 100.00 $
- External source of data
- Ernst Erb
- Source of data
- The Radio Collector's Directory and Price Guide 1921 - 1965
- Circuit diagram reference
- Rider's Perpetual, Volume 1 = 1931/1934 (for 1919-1931)
- Mentioned in
- Radio Manufacturers of the 1920s, Vol 1
- Literature/Schematics (1)
- A.Atwater Kent, The Man, 2002
- Other Models
-
Here you find 508 models, 332 with images and 332 with schematics for wireless sets etc. In French: TSF for Télégraphie sans fil.
All listed radios etc. from Atwater Kent Mfg. Co.; Philadelphia, USA
Collections
The model 4640 is part of the collections of the following members.
- Mike Argetsinger (USA)
- Jürgen Bauch (D)
- Rodney Boleyn (USA)
- Phillip Clay (USA)
- Jean-Luc Comblin (B)
- Ernst Erb (CH)
- Kenneth Gregory (USA)
- Marko Karlin (SLO)
- Roberto Montalto (I)
- Eli Ouziel (USA)
- Antoni Regeling (USA)
- Ignacio Rodriguez-Rodriguez (E)
- Hermann Schagerl (A)
- Heinz Schmidt (D)
- Carlos Sempere-Carrión (E)
- Lindsay Shepherd (AUS)
- Francisco Suarez (RCH)
- Serioja Tatu (CDN)
Forum contributions about this model: Atwater Kent Mfg. Co: 4640 Model 20 big box
Threads: 4 | Posts: 6
This article describes the restoration and test of an Atwater Kent model 20, big box.
The output AF signal is improved by using a -C battery, not initially in the schematic.
The receiver has outstanding performances for the begining of the 1920's.
Attachments
- Restoration and test of AK model 20 (594 KB)
Serioja Tatu, 20.Dec.24
Extracted from "Radio Digest" Vo.XV No.6 of November 14th, 1925. The author is yet unknown.
Operating And Trouble Shooting
For the Owner of an Atwater Kent Model 20
Extensive tests with this set showed that it could be used, with excellent results, on almost any type of antenna. Naturally, the best results are secured with a high outside wire since more energy reaches this type. The length over-all, including the lead-in and ground should, preferably, not exceed 100 to 150 feet. If one long straightaway wire is impossible and an aerial of two or more wires is used, the space between wires should be not less than 3 feet and greater separation would be to advantage.
Antenna and Ground
Between a loop antenna and an indoor wire, tryouts proved the indoor to be slightly better. A wire was strung straight down a hallway about 40 feet in length and 6 inches below the ceiling, attached at each end to the top of a door frame with insulators. This worked very nearly as well as the outside wire. Since an antenna strung behind the picture moulding of two rooms was available this was also tried and, while the volume was not quite as great, the selectivity was increased to knife-like sharpness and the range differed not at all. Although it was not tried, there seems good reason to believe that an attic antenna would give even better results than the wire strung in the hall.
The ground, as usual, was made by scraping the water pipe and tightening a substantial ground clamp around the clean portion. In this case the connection was made in the basement near a window, the wire run out through a small hole in the basement window frame and up to the window through which the antenna lead from the outside wire was passed. Both wires are brought, in porcelain tubes, through a board under the sash.
Tubes and Batteries
Following the manufacturers' instructions, five "hard" tubes of the A type were used, instead of four A tubes and a soft detector. Although the set performed well on the first insertion of tubes, they were switched around while the set was left tuned to a station to ascertain whether any of them performed better as Radio frequency amplifiers. Some improvement in both volume and clearness was perceptible when the first Radio frequency tube and the detector tube were exchanged. The battery is a 6-volt, 120 ampere hour unit and, while it may be used for several days and then recharged for several hours at a high rate, it has been found better practice to charge it a little each evening while at dinner to make up what was used the evening before. A charging rate of 2 1/2 amperes for an hour seems to keep this one about right.
Model 20 was used on both storage and dry cell B batteries. Performance over a period of six weeks is apt to be more consistent with the former, but no difference could be noted during the two nights' test of this set, though the dry cell blocks were 10 per cent gone and the storage cells freshly charged. When making connections to this receiver/ or any other for that matter, make one cornplete connection from set to battery at a time, rather than making five connections to the batteries and then connecting all the loose wires to the set. Care should be observed when connecting the loud speaker that the cord with the red htread interwoven in it is connected to the post marked "Red Tracer Lead."
Check all battery, antenna, ground and speaker connections once before putting in any tubes; then insert one in any socket and pull the filament switch out. Turn the rheostat over slowly and, if tube lights dimly it will be alright to insert the other four tubes. Turn both rheostats to right nearly to the maximum position, and one is ready to tune in sations.
Operation

It will be found that the second and third dials will always be at very nearly the same setting for any given stations, while the first dial will be at some point slightly above or below them, depending on the position of the tap switch. This switch is provided to adjust the set to any antenna with which it may be used. A few trials will show on which tap it should be set for maximum results, after which it can be left there. In the case of our tests it was found that tap number 2 worked slightly better than the others.
First of all set dials 2 and 3 on, let us say, 56. Then swing dial 1 slowly from 40 to 70. If no program is heard, even faintly, shift dials 2 and 3 to 54 and again swing dial 1 through the short arc. After
two or three shifts, a station will be heard and all dials can quickly be set to maximum response. Then adjust the two rheostats to the point where both volume and clearness are at maximum, but do not turn them any further to the right as this would merely be burning up energy uselessly and will shorten the life of the tubes.
With a distant station tuned in, try shifting the switch located between dials 1 and 2 and reset the dials slightly. If any increased response is noted write down the dial settings and then tune in another station with the switch back on the point at which it Was before. Then shift switch and reset dials as before. This procedure on different stations located in several directions will determine once and for all the switch setting and it should then be left alone. It will be found an excellent idea to keep a little red tag or something else bright in color attached to the filament switch for a few days, as otherwise if one leaves the set at a time when signals are not tuned in, it is very easy to go off and leave the tubes burning, possibly for many hours. The tag Serves to attract one's attention and remind that the switch should be pushed in. After the fact that the switch is there and is to be used, has been sufficiently impressed on one's mind; the tag can be removed.
Dial Settings
The dial settings we found with the antenna compensating switch on point 2 are shown here and it seems reasonable to believe that other Model 20 sets will follow these settings very closely.
| Wave Length | Dial 1 | Dial 2 | Dial 3 |
| 278 | 18 | 22 | 22 |
| 309 | 24 | 28 | 28 |
| 337 | 30 | 34 | 34 |
| 380 | 41 | 45 | 45 |
| 429 | 52 | 56 | 56 |
| 469 | 64 | 68 | 68 |
| 492 | 70 | 74 | 74 |
| 517 | 78 | 82 | 82 |
| 536 | 84 | 88 | 88 |
Georg Richter, 12.Jan.14
Ich habe aus den USA eine AK Big-Box erhalten,die im NF-Bereich so gar nicht
mit der normalen BIG-Box übereinstimmt.
Sie hat 6 Röhren (2 X UX201A und 4 X Daven MU20 ).Da die Big Box nicht verbastelt
aussieht stellt sich hier die Frage ob es sich eventuell um einen Prototyp handeln kann ?
Für Hinweise zur Aufklärung würde ich mich freuen.
Attachments
- Innen (45 KB)
- Innen 1 (51 KB)
- Verdrahtung (58 KB)
- Verdrahtung 1 (64 KB)
- Innen 2 (43 KB)
- Front (93 KB)
- Typenschild (108 KB)
Jürgen Bauch, 30.Oct.11
Ultimamente he estado reacondicionando algunos modelos de AK, concretamente los modelos 20 normal y el compacto.
Es una experiencia nueva e interesante ya que hay que conseguir las valvulas tipo "01" con los 4,0 voltios en filamento - sin catodo - y es necesario confeccionar un suministro de continua, mejor con baterias recargables, ya que de lo contrario, o sea, con supresores de bateria, hay siempre una componente de rizado de alterna que molesta la recepción
Lo más complicado de todo es la sustitución en casi todos los casos de los transformadores de BF, de relación 1/3 ó 1/4 con el primario abierto. La sustitucion se hace con nuevos conseguidos en USA y encapsulados en los antiguos recipientes, para respetar el aspecto.
El resultado es siempre enriquecedor, sobre todo porque da la impresión de trasladarte al principio de la radio y la emoción de la sintonización de las distintas emisoras.
Dispongo de las direcciones donde se puede conseguir ese material antiguo. La fuente principal es en e-Bay para las radios antiguas y Antique Electronic Supply en USA para componentes.
Un saludo
F. Quintana-Calduch, 30.Sep.09


