Dial Scales - Homemade with Inkjet Printer
Dial Scales - Homemade with Inkjet Printer

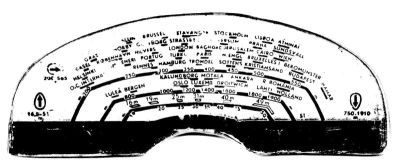
I ran across this thread in another forum and was impressed with the results the writer obtained in his creation of a replacement dial scale. Perhaps this will be of interest to those who have been unable to procur a replacement dial that they need. (A good copy is needed of the original dial - many times this can be provided by another member.)
http://antiqueradios.com/forums/viewtopic.php?p=488702#488702
Regards,
Dennis Wesserling
To thank the Author because you find the post helpful or well done.

Hello Dennis. A inkjet repro gives good results in desperate cases, but unfortunately can't render the white colour (or very light tones), which by the way are widely used expecially on those dial scales that are not lightened from behind the glass in trasparency but instead from inside the glass in reflection (that is: with lights placed laterally in respect to the glass).
While we're talking - I've heard that in the States there are some dial repro makers who offer a true serigraphic work (real paint on glass). Do you know any? Are the prices outrageous or affordable? Anyone knows any offering the same service in the European area, perhaps?
To thank the Author because you find the post helpful or well done.
Greetings Marco,
Nice to hear from you.
You are correct about the inability of ink-jet printers to render a white color. I think though, that this is pertinent only when trying to create a wet-transfer decal. Any white coloring in the graphics will simply result in a clear area on a typical sheet of wet-transfer "paper".
However, if WHITE wet-transfer paper is used the result will indeed be bright white or light-colored areas where desired.
WHITE wet-transfer paper is now available from http://www.decalpaper.com/index.html
it is also available from http://66.70.211.27/index.html
In the example shown in the weblink I provided, the author required a scale that had no white areas on it so he was able to replicate an acceptable dial scale......then by laminating it with clear plastic it took on the appearance of a "factory-original" dial scale. It also lighted from behind with good results.
I, myself, have had success creating white "raised-letter" decals to apply to radio cases, dial rings etc. This process uses clear wet-transfer decal paper. While the ink is still wet a white powder is applied and then heated with a heat gun. I can provide examples and more information about this process if you like.
__________________________________________________________________
The main point of your response however pertained to GLASS dials that have "painted on" or silkscreened graphics.
There is a company here in the USA that makes and sells glass dial scales. It is called "RADIO DAZE". Visit their website at http://www.radiodaze.com/
Unfortunately, at this time they only make glass dial scales for American made radios. They have an extensive listing of approximately 200 radio models that they produce scales for. Also, they only produce FLAT dial scales. I have heard that their quality is high and that they use epoxy based inks for the graphics. Their website also has prices shown. Also they make mention that they can be contacted if you have any "special" needs................so, who knows - perhaps they would produce a custom dial scale if they were provided with the necessary art work.
I hope I have provided you with some useful information.
Regards,
Dennis
To thank the Author because you find the post helpful or well done.
Two samples from here

Hello Dennis,
Thanks for your article. The wet-transfer Decal Paper is a very good idea. I'll try this methode.
Here I have tried also to print a dial-scale in an ink-jet printer. The original dial was broken and a piece was missed. The missed part had to be rebuilted in "Paint Brush".
The result was not bad.
See:
http://www.radiomuseum.org/r/schaub_goldy_2p_iip_3620.html
This dial-scale was printed in HP ink-jet printer on a transparent film. Afterwards ithe film was put between two glass plates.
--------------------------------------------------------------------------------------------------------------------------------
For serigraphic work (real paint on glass) our friend José Duarte Costa,
member:
http://www.radiomuseum.org/dsp_profile.cfm?Member_Id=3284&Show_id=1
had made some dials in white. The resuts were very good indeed.
Here is an example of a dial he made for my Philips BX272U.
http://www.radiomuseum.org/r/philips_bx272u.html

Best Regards from Portugal
Mário Coelho
To thank the Author because you find the post helpful or well done.
Hi Mario...........
Thanks for contributing to this thread.
I am interested in the process that Jose used to create the glass dial scale for you. Can you perhaps elaborate on his process ? Is this a silkscreen ? .............or perhaps he might have used a different type of printer - such as an ALPS printer .... to create a white graphic ?
The quality that I perceive in the pix that you posted seems to be VERY aceptable. It would be great to be able to produce dial scales of this quality at home.
Dennis
To thank the Author because you find the post helpful or well done.
Hello Mario. The example you posted seem to be the definitive solution for transparent dial scales with white letterings. Would you mind contacting the man who made it and ask if he would be so kind to share with us the technique he used to make it?
@ Dennis: I didn't know about the decal paper. It seems a very interesting material (though not available in Europe, AFAIK). However, I can't imagine how to make a repro dial as the one shown by Mario with it. And how well do the inkjetted inks stand some cleaning - even made with simple water? Wouldn't they dissolve immediately, if cleaned? I am thinking, in this case, about lettering for knobs, levers, switches etc.
To thank the Author because you find the post helpful or well done.
Contact
Dear Dennis and Marco,
I already had a phone call to José Duarte Costa. He told me he will reply soon.
Regards
Mário Coelho
To thank the Author because you find the post helpful or well done.
Hello Marco and all,
I will try to provide some further information on the wet-transfer decals and where they might be most effectively used.
A dial scale such as the one made by Jose would not be possible with wet-transfer decals. Scales that have white graphics and much “clear” space are better left to silk-screening / serigraphy I think.
As you mentioned though, any opaque surface lends itself well to decals. And….WHITE decals are possible for application to opaque surfaces as long as the White Embossing Powder is used to create “raised-graphics”. This is the process I spoke of where the powder is applied to the still-wet ink then is heated with a heat gun causing the powder to melt and fuse into a uniform “raised” entity. Raised-graphic embossing powders are available in many colors. I have used white, gold and red so far and I have several other colors on hand. Once the powder fuses the graphics are no longer affected by water. As with any graphic applied to a radio case, or knob etc. it is best to use a clear overcoat to minimize wear. The company that produces the decal-making supplies also sells a liquid that it brushed on to the decal after it is applied (called “Micro-Sol”). This causes the edges of the decal to become less visible and also causes the decal to “set” onto the surface more securely. Below is a series of photos detailing the creation of new graphics for the dial ring on a Zenith K725.


On the other hand, flat decals (i.e. – not the RAISED type) are possible for application on just about any surface………knobs, dial rings, cabinets etc. Once you have used your artwork to print the graphics onto a sheet of clear decal paper the paper is sprayed with a special protective coating. This is allowed to dry for 2 hours and makes the decals unaffected by water. Again, after application a clear overcoat is used – either brushed on locally or sprayed on as an entire clearcoat – to protect the decals from wear and tear.
Here is an example where I created FLAT decals to enhance the graphics on a dial knob:


And remember if you want WHITE flat decals you must use WHITE decal paper as opposed to clear decal paper…..however….if you do this you than cannot create a decal that has clear areas.
All in all I feel that wet-transfer decals have a useful place in our hobby. They are not the ultimate solution for creating graphics from scratch but they do have applications where they can provide good results.
(I apologize if I have used up an excess of storage space on RMorg but I did not know how to demonstrate this process without these photos.)
Regards,
Dennis
To thank the Author because you find the post helpful or well done.
Dial Scales

Dear Radio Friends,
The method that I performed to make the dial-scale for Mário Coelho is Serigraphics.
The reasons of my option for this methodology were:
1- To print on any surface, like glass, plastics, paper or cloth.
2 -To allow any colour, white included.
3- To get a very good final quality, as well the durability of the printing.
I think this is the method used by radio manufacturers.
The procedure to make a dial scale:
1- To scan the original dial-scale.
2- To work on the picture to rebuild the types in order to improve them. (Software COREL).
EXEMPLE ::OLD DIAL
3- To print it on a photographic film or on paper.
4- To print by serigraphic method on glass.
EXEMPLO :

Is possible to perform all the serigraphic process at home, but it becomes more expensive and one needs to buy several materials, like silkscreen, ink etc.
Best Regards
José Duarte Costa
To thank the Author because you find the post helpful or well done.
@ Dennis: this process with white powder seems extremely promising. What bugs me is how one could manage to pour the powder on WET ink. When papers come out of my printer, they are almost 90% dry already. Does the ink stay wet longer on that decal sheets perhaps? How much time does one have between printing and powder pouring? Is it so critical that only small areas of a sheet can be done before the ink gets dry? White apart, are there other colours available?
@ Jose: thanks for your message, but you missed to explain how you could have the major part of the deal done - that is SERIGRAPHY. Did you find a place where it is done at reasonable prices, perhaps? Or did you made it by yourself? In the last case, I strongly encourage you to write an article about how it can be done at home with success!
To thank the Author because you find the post helpful or well done.
Marco,
Quote: "how one could manage to pour the powder on WET ink. When papers come out of my printer, they are almost 90% dry already"
Answer: The decal paper has a very shiny texture. The ink remains wet on it for a considerable amount of time. Although I move at a steady pace when adding the powder and heating the graphics I have never really felt that I had to rush or be in a particular hurry. The first time I made some embossed decals I had the same concern as you but soon learned that speed is not a requirement.
As far as colors go, I have 6 or 7 colors of powder on hand. There are many colors (and textures) available from the place where I order my powder supplies from.
I order powder online from a place called "Creative Images" at : www.cistamps.com/embossin.htm
I just did a check of their website and it appears that they will ship internationally.Their store is located in Burlington, Kansas, USA
I believe that these "embossing powders" could be available in many locations locally. Stores that sell supplies for rubber stamps (such as those used for craft projects) usually sell an assortment of powders.
If there is anything I can do to help you out please don't hesitate to ask.
Regards,
Dennis
To thank the Author because you find the post helpful or well done.
Hello Denis, you really, really helped a lot! I think I shall go to some local Art shop before placing an order on the internet, because maybe everyone in town knows about these embossing powders but me... I just have two more questions:
1) Do you have any idea in regard to the durability of this material? I mean: will the writings made with these powders dry up and crack, or perhaps melt, after few years?
2) How much permanent are the writings? Will they wash away if the dial glass is cleaned with some detergent or such?
To thank the Author because you find the post helpful or well done.
Marco,
I would say that the durability of the raised-letter decals (and also the flat decals) would be very good. Remember, after application and some drying time, the decals are to be covered with a clear lacquer overcoat. Not only does this overcoat protect the graphics from wear, but also from moisture - such as when cleaning etc. The Zenith k725 dial ring pictured earlier in this post is a good example. That particular radio has a tone control located in the center of the dial so.....when using the tone control a person's hand tends to rub on the brass dial scale ring. So far, after several months of constant use there is no wear at all apparent on the dial ring graphics. I think it will last a long time.
www.radiomuseum.org/dsp_picture.cfm
I must re-iterate though that I would hesitate to use either type of decal on glass. The reasons for this disclaimer are:
- The "edges" of the decals (depending on how closely you trim the decals to the actual edge of the graphics) would tend to be more visible on glass than on an opaque surface such as metal or a wood or bakelite cabinet or perhaps a plastic knob etc.
- Any clear overcoat that is used to protect and seal the decals would probably not look perfectly clear and smooth when viewed through the glass.
- I would recommend serigraphy / silk screen printing for clear glass dial scales (I've gotta learn how to do that ! :O) I'm not saying that you can't use them on glass - there are some instances where it would work ok - but usually it would not be the best way.
As I said before - wet transfer decals are not the answer for every application but are certainly a great way to replace missing graphics in many instances. Perhaps other members have some experience in this method and could contribute to our knowledge.
Dennis
To thank the Author because you find the post helpful or well done.
Spray Aerosol Decal Coating
Dear Dennis,
I've just bought here, in Portugal, some clear SuperCal sheets, to be used in my Inkjet printer.
Unfortunately my supplier didn't provide me any Spray Aerosol Decal Coating. He told me that Microformat Inc. doesn't ship it outside USA.
So, I've a problem and no visible solution by now.
Maybe I could try to use a “similar” aerosol lacquer spray..... What do you think about this?
If that's possible, what kind of aerosol do you suggest? Alcohol basis? Acetone basis? Or other basis?
Your help will be welcome, like before.
Best Regards
Mario Coelho
To thank the Author because you find the post helpful or well done.
Response to Mario - Spray decal coating
Hello Mario, very good to hear from you once again.
It is very unfortunate indeed that the company that sells the "Last Stop Decal Coating" cannot ship outside of the USA.
Perhaps you can match the ingredients with a product that is sold in your country.
Here is an exact list of the ingedients that are listed on the label of the aerosol spray can that I have:
Xylene 1330-20-7
Propylene Glycol Methyl Ether Acetate 108-65-6
Acetone 76-64-1
Hydrocarbon Propellant 68476-86-8
If you cannot match these ingredients perhaps you could experiment with a clearcoat of spray clear lacquer. Lightly "misted" on the decal a few times then coated more heavily to seal the decal.
~~~~~~~~~~~~~~~~~~~~~~~~~~~~~~~~~~~~~~~~~~~~~~~~~~~~~~~~
It should be noted that when coating the printed decal sheet the following practices should be followed.........I have learned these by experience.
- After printing you MUST let the ink dry thoroughly before spraying on the clearcoat. This, of course, does not apply if you are creating "raised letter" decals as detailed earlier in this thread. "Raised letter" decals have a powder applied to the ink while it is still wet, then the powder is treated with a heat gun to fuse the pigments.
- When applying the clear coat.....spray a few light coats at first. Remember, inkjet printer ink is water soluble and just about any type of applied liquid mixture could cause the letters to run if it is applied too heavily at first. You must however, be sure that when you have completed applying the final clearcoat to the decal it covers the letters well enogh to prevent water from getting at the dried ink when you wet the decal prior to applying it to your radio case.
- After clearcoating the decal.....I wait several hours before actually cutting out the decals and applying them to the radio case, to let them dry completely (and then some). And remember it is best to trim, with a sharp scissors, very closely around the edges of the decal to prevent the appearance of an "edge" when the decal dries.
- When all decals are completed it is best, if possible, to clearcoat the entire radio case with whatever product is your chosen finish.
I hope I have been of assistance.
Kind regards,
Dennis.
To thank the Author because you find the post helpful or well done.
Alcohol basis lacquer?
Hello Dennis again,
Thank you for your complete and prompt reply.
Thank you also for sharing your know-how . e.g. gap time between the printing and spraying appliances.
I agree that is quite difficult to find out all those chemical products, so I accept your advice in order to use a lacquer spray instead.
I apologize to return to this matter, but I didn't understand yet which lacquer made of can be used . I think that an alcohol basis lacquer is not convenient because, like water does, it may dilute the ink. Am I right? Acetone basis lacquer? Cellulose basis lacquer? Terbentine basis lacquer ? Which one?
I apologize for so many questions.
Regards
Mario
To thank the Author because you find the post helpful or well done.
Decals 1
Mario,
your question set me to thinking about what really WOULD be the best clear lacquer to use. I happen to have an aerosol can of clear lacquer that is advertised for use over polished brass...........to prevent future tarnish. It's label tells me that it is an acetone based lacquer. I would think that such a lacquer would be a good one to try an experiment with.........rather than any other type such as alcohol based. The original aerosol spray that I purchased from the decal company is acetone based.
Try printing a brief line of text in a fairly heavy, black font. After the ink dries, cut the test decal from it's large sheet (don't want to waste any of that expensive decal paper) and spray it lightly with the acetone based lacquer, after each coat dries, mist another light coat on top of the previous one......do this 3 or 4 times. when the final light coat is dry give the decal one last heavier coat and let it thoroughly dry.....2 - 3 hours.
THEN.......submerge the test decal in water (handle with tweezer) just long enough for it to loosen and slide off of it's backing onto a test surface.
If you can do this successfuly, without the ink diluting or running..............SUCCESS !
Again.....this is simply an experiment to find out if the acetone based lacquer is the right type to use. Please keep me informed of your results.
EDIT: 10/4/08
I'm editing this post to include a couple of photos of a recent project that incorporated home-made water-slide decals. Using a schematic found on the internet I built a "Farm Radio Power Supply" that I will be using to service / restore battery powered radios.
The graphics on the front and back of the power supply were created on my computer using my photo processing / graphics program. I then printed the decals as discussed above, cut them out, clearcoated them with the spray I purchased from the decal supplier, and applied them to the little cabinet ........I then clearcoated the entire cabinet with clear acetone-based lacquer to protect the decals from scratches, etc.
So, you see, decals can be useful on other projects as well as radios, dial scales etc.
I have to admit, it is fun also..........
.JPG)
.JPG)
Dennis.
To thank the Author because you find the post helpful or well done.
Types of laquer

Dear Mario,
don't mix several things up. You asked questions in respect of the resin used for the laquer (e.g. Cellulosis) and about the solvent (acetone, alcohol etc.).
First of all I would agree that a water based laquer would react with the decal and the ink more than wished. They need more time to dry and give the ink time to dilute.
The resins used in water based spray laquers are so called acrylic resins. They give a good and long lasting robust clear coating. However to my personal experience I do not prefer them for old radios because the often look like "plastic coated", which means that the gloss does not fit to the old radio and the coating looks quite thick. There have been already discussions about laquers for radios here in the forum.
Other spray laquers use a mixture of different solvents as base. Dennis named them and the European spray laquers use the same mixture which varies a little bit from supplier to supplier and the type of resin used. The base resins are mainly so called alkyd resins and in some rare cases nitro-cellulosis which is mainly used by artists or for special puposes (musik instruments). Nitro-cellulosis is only used for wood and is not suitable for outdoor applications. It might become yellow and should not be used for coating of decals to my opinion. You can get this laquers as satin matt or glossy. Alkyd resins are very suitable as a top coating for apparatus. I personally prefer them.
Keep an eye on Dennis' description. First layer very thin to avoid any solution of the ink or the decal in the laquer. It has to dry within a few seconds. Repeat the process and if the ink is bonded and very thin coated by the laquer you can apply the topcoat in a thickness and gloss after your personal fancy.
Best regrds
Ruediger Walz
To thank the Author because you find the post helpful or well done.
Whish me luck
Hello Dennis,
Thank you for your reply and for let me see your new project. It is a good example, as you usually do.
Now I've to look here around for an acetone based lacquer. I hope to be luckier this time.
If not I'll try to buy in New York. I hope to be there on the 26th of November. Maybe you know any representative in Manhattan. Do you?
Kind Regards
Mario
Hello Rudiger,
Thank you for your help.
Yes, I'm not good in Chemistry.
I 'll look too,here around, for an Alkyd resins lacquer, but I'm not sure that anybody can help me here. It is not easy to find out here a store selling these products namming its chemical components.
Wish me luck.
Best Regards
Mario
To thank the Author because you find the post helpful or well done.
While in New York.....
QUOTE: " If not I'll try to buy in New York. I hope to be there on the 26th of November. Maybe you know any representative in Manhattan. Do you?"
Mario,
Unfortunately I am quite a distance from New York and do not know anyone in that area. I reside in the Southeast area of the State of Michigan (Just across the border from Windsor, Ontario, Canada.) This is approximately 650 miles (1050 km) West of New York City
While in New York stop in to any local hardware store (ACE hardware for instance) or retail store (WalMart etc.) that sells spray paints. I am sure that acetone based clear lacquer is very common and readily available in many stores. I would think that it would be equally easy to find in Portugal as well.
If purchasing in the States, I would first look into the possible restrictions of boarding an aircraft with aerosol spray lacquer in your stowed or carry-on baggage.
To thank the Author because you find the post helpful or well done.
Dry Transfer Decal System to Recreate Dial Scales

I successfully reproduced a "back painted" dial scale for my Blaupunkt KW741 this weekend. The method I used was a dry transfer decal that I created and printed on Toner Transfer paper from a decal kit I purchased from Decal Pro FX. This was a rather complex system, but nevertheless, the end results were a back printed dial scale that is virtually indistinguishable from the original.
I first created the image using Power Point and used a scan of an original dial scale that a member sent to me. This is not mandatory, but does make the recreation a bit simpler. You could also create the image from a mere photograph of the target radio, if the dial scale is visible.
I knew the dimensions of the dial scale (in this case, 120mm x 62mm), so I adjusted the image size until I had achieved the correct dimensions printed out on paper. Then I printed the image to a sheet of Toner Transfer paper. After cleaning the image with 91% Isopropyl Alcohol, I placed a sheet of white transfer foil (also included in the kit) over the image, and ran them both through a laminator. Then I peeled off the white foil. The black lettering now had a white backing. This is required so that the letters and image do not appear transparent.
After another alcohol cleaning, the next step was to bond a sheet of clear Mylar to the image by running them both through the laminator. Then I dropped the paper into a water bath for 15-20 seconds. The dextrin coating on the transfer paper dissolved and the image remained adhered to the sheet of Mylar.
After carefully drying the image, I taped the corners down to the table and applied a very light mist of Sulky KK2000 adhesive spray, dried it with a heat gun then carefully lowered my glass into the correct position over the decal. Pressing firmly into the glass, then peeling back the Mylar, I now have a wonderful new dial scale that looks as if it had been silk screened.
Note: I had many, MANY failures before I successfully finished this project, but I now have the skill to do it again with much more ease. Any color can be produced, as well as metalic images in gold, silver, etc.
Attachments:- Blaupunkt_KW741_dial_scale_1 (72 KB)
- Blaupunkt_KW741_dail_scale_2 (110 KB)
- Blaupunkt_KW741_dial_scale_3 (122 KB)
To thank the Author because you find the post helpful or well done.