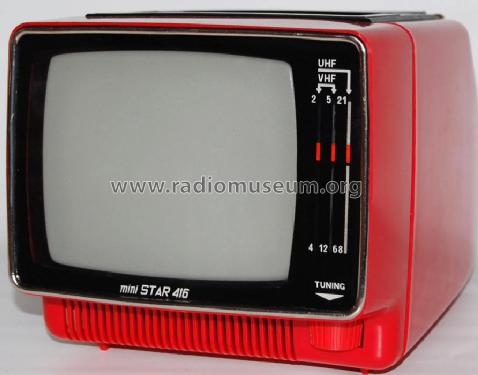
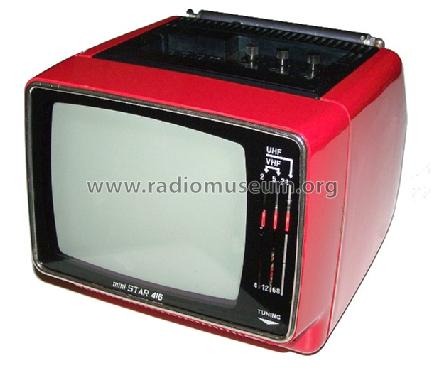
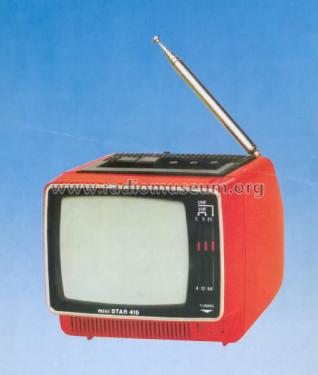
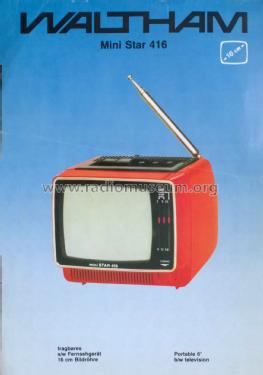
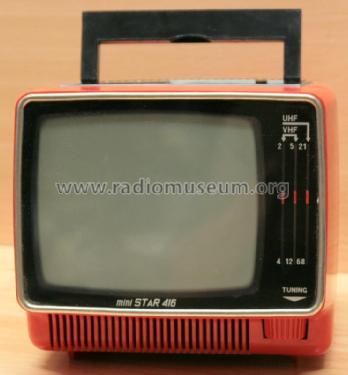
Mini-Star 416
Waltham S.A., Genf
- Pays
- Suisse
- Fabricant / Marque
- Waltham S.A., Genf
- Année
- 1984
- Catégorie
- Récepteur de télévision ou moniteur
- Radiomuseum.org ID
- 111884
-
- Brand: Waltham


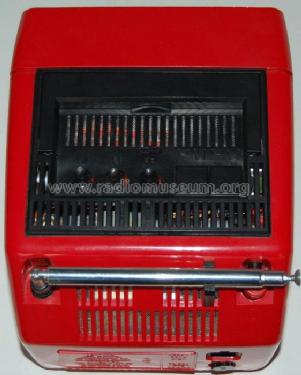

Gehäuse abgenommen

Das Netzteil ist an der Rückwand befestigt.
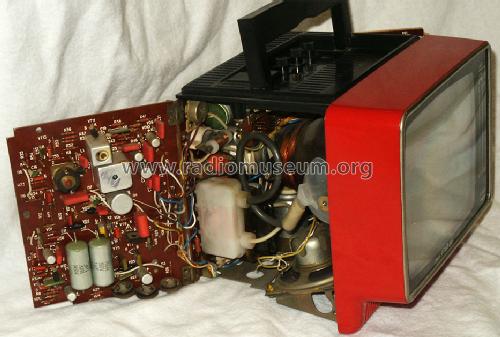
Ablenkplatine ist ausgeschwenkt
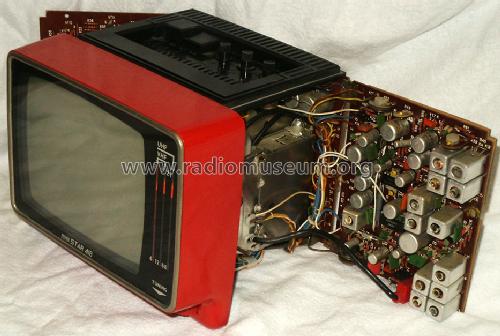
HF-Platine ist ausgeklappt.
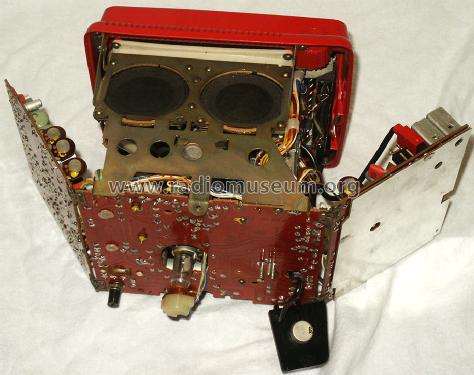
Chassisunterseite mit 2 Lautsprechern.


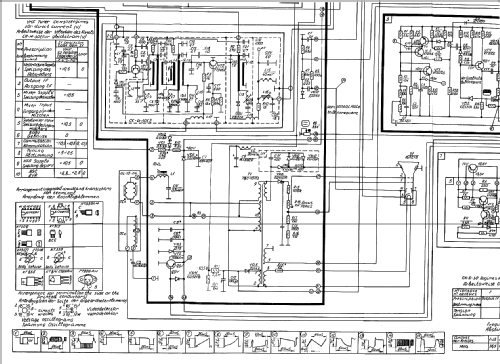
Cliquez sur la vignette du schéma pour le demander en tant que document gratuit.
- No. de tubes
- 1
- Lampes / Tubes
- 16ЛК1Б
- No. de transistors
- Semi-conducteurs présents
- Semi-conducteurs
- Principe général
- Super hétérodyne (en général)
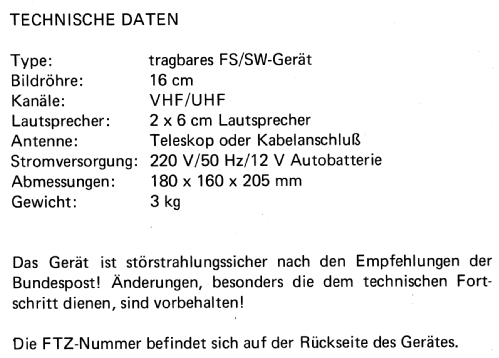
- Gammes d'ondes
- Bandes en notes
- Tension / type courant
- Secteur et Piles (tous types). / 220 / 12 Volt
- Haut-parleur
- 2 HP / Ø 6 cm = 2.4 inch
- Matière
- Plastique moderne (pas de bakélite, ni de catalin)
- De Radiomuseum.org
- Modèle: Mini-Star 416 - Waltham S.A., Genf
- Forme
- Portative > 20 cm (sans nécessité secteur)
- Dimensions (LHP)
- 180 x 160 x 205 mm / 7.1 x 6.3 x 8.1 inch
- Remarques
- 16 cm B/W TV with CCIR VHF/UHF tuner, built-in telescopic antenna, made in USSR.
- Poids net
- 3 kg / 6 lb 9.7 oz (6.608 lb)
- Prix de mise sur le marché
- 159.00 DM
- Littérature
- -- Original prospect or advert
- Schémathèque (1)
- -- Schematic
- Auteur
- Modèle crée par d'un membre de A. Voir les propositions de modification pour les contributeurs supplémentaires.
- D'autres Modèles
-
Vous pourrez trouver sous ce lien 44 modèles d'appareils, 42 avec des images et 13 avec des schémas.
Tous les appareils de Waltham S.A., Genf
Collections
Le modèle Mini-Star fait partie des collections des membres suivants.
Musées
Le modèle Mini-Star peut être vu dans les musées suivants.
Contributions du forum pour ce modèle: Waltham S.A., Genf: Mini-Star 416
Discussions: 1 | Publications: 1
Ich erhielt eine Anfrage, ob ich das Netzkabel für diese FS-Gerät habe und verkaufen würde. Da meine beiden Geräte spielen und ihre Kabel benötigen, habe ich nach Ersatz gesucht und die Anschlüsse ausgemessen.
Das Gerät hat 6 Anschlussstifte.
Die beiden oberen Stifte benötigen die Netzspannung (220 - 230V),
die beiden Mittleren müssen gebrückt werden, denn darüber wird die 12V Gleichspannung geleitet.
Ich habe nun mein Gerät mit sicherem Ersatzkabel angeschlossen.
Ein übliches Netzkabel, das für viele Transistorradios mit Netzanschluss und bei anderen Geräten benutzt wird, habe ich auf die oberen Pinne gesteckt. Es passt genau und sitzt fest.
Von einem weiteren Kabel habe ich den Stecker abgekniffen und die beiden Drahtenden verlötet und isoliert.
Den Stecker habe ich auf die mittleren Pinne gesteckt.
So spielt das Gerät
(Die unteren Pinne sind für 12V DC vorgesehen und werden am Netz nicht benötigt). Dort kann ich ca 17V= messen.

Heribert Jung, 06.May.12